Pay Periods
You apply a Pay Period Profile to a user account to define the user’s pay frequency. You can create any number of profiles to reflect the different pay frequencies used in your organization.
To create a Pay Period profile, navigate to Administration > HCM Setup >Settings > Profiles/Policies > Pay Periods. The Company Pay Period Profiles report page appears. Select the New Pay Period Profile button.
In the Pay Period Profile widget, enter and choose the following settings:
Name: Enter a name for the Pay Period Profile.
External Id: Optionally enter an Id number associated with this Pay Period Profile.
Description: Enter a brief description of the Pay Period Profile.
Active: Check the check box to make this profile active for use.
Pay Period Type
The settings in this section specify the pay frequency of this Pay Period Profile. Select the appropriate radio button and enter any additional information.
Quarterly: Select this to set the Pay Period for a 3-month cycle.
Monthly: From The [ ] Day Of The Month: If you select this, you also select 1st through 28th day of the month, or Last day of the month.
Monthly: From The [ ] [day of week]: If you select this, you als select 1st through 28th day of the month, or Last day of the month. Then you set a day of the week for the pay period to start on.
Semi-Monthly: Starting on [ ] And On [ ] Of Each Month: Enter start dates for each block of time. For example, you might enter the 1st and 15th of each month.
Weekly: Starting on [day of week]: Specify the day of the week for the pay period to start.
Every [ ] Weeks: Starting From [calendar day]: Use this option for bi-weekly or irregular pay periods. Enter the first day of your pay period, not your check date.
Every [ ] Days: Starting From [calendar day]: Use this option to create the pay period based on the number of days you define. For example, you might configure the pay period to occur every 20 days.
User Defined: Use this field to create a custom pay period with date ranges you choose.
Effective Dates
Enter the date on which the pay period is effective. If your pay period is changing, you only need to fill in the To date. Otherwise, leave this field blank, which means that this pay period will remain active indefinitely.
Options
# Pay Periods In A Year [ ] Override [ ]: In this field, enter the number of pay periods in the year for your pay cycle. For example, a weekly pay period has 52 pay periods yearly. You can allow this setting to be overridden by enabling the Override checkbox.
Auto Lock Pay Period: Use this setting if you want the system to automatically lock the Pay Period. Put a check in the check box, and also set when the system should lock the pay period after the pay period’s end date. Options for the Period End are On (pay period), or 1-30 days after (pay period).
Auto Remove Employees When Account Status Is Not In Payroll And Is Terminated Is Not Checked: Enable this checkbox to automatically remove employees from active and future pay periods when they have an account status indicating the employee is not in payroll.
After you select Save at the top of the page, a warning message informs you that you can't change the profile after it is saved. Select Yes to proceed. The system automatically creates and displays the Pay Periods.
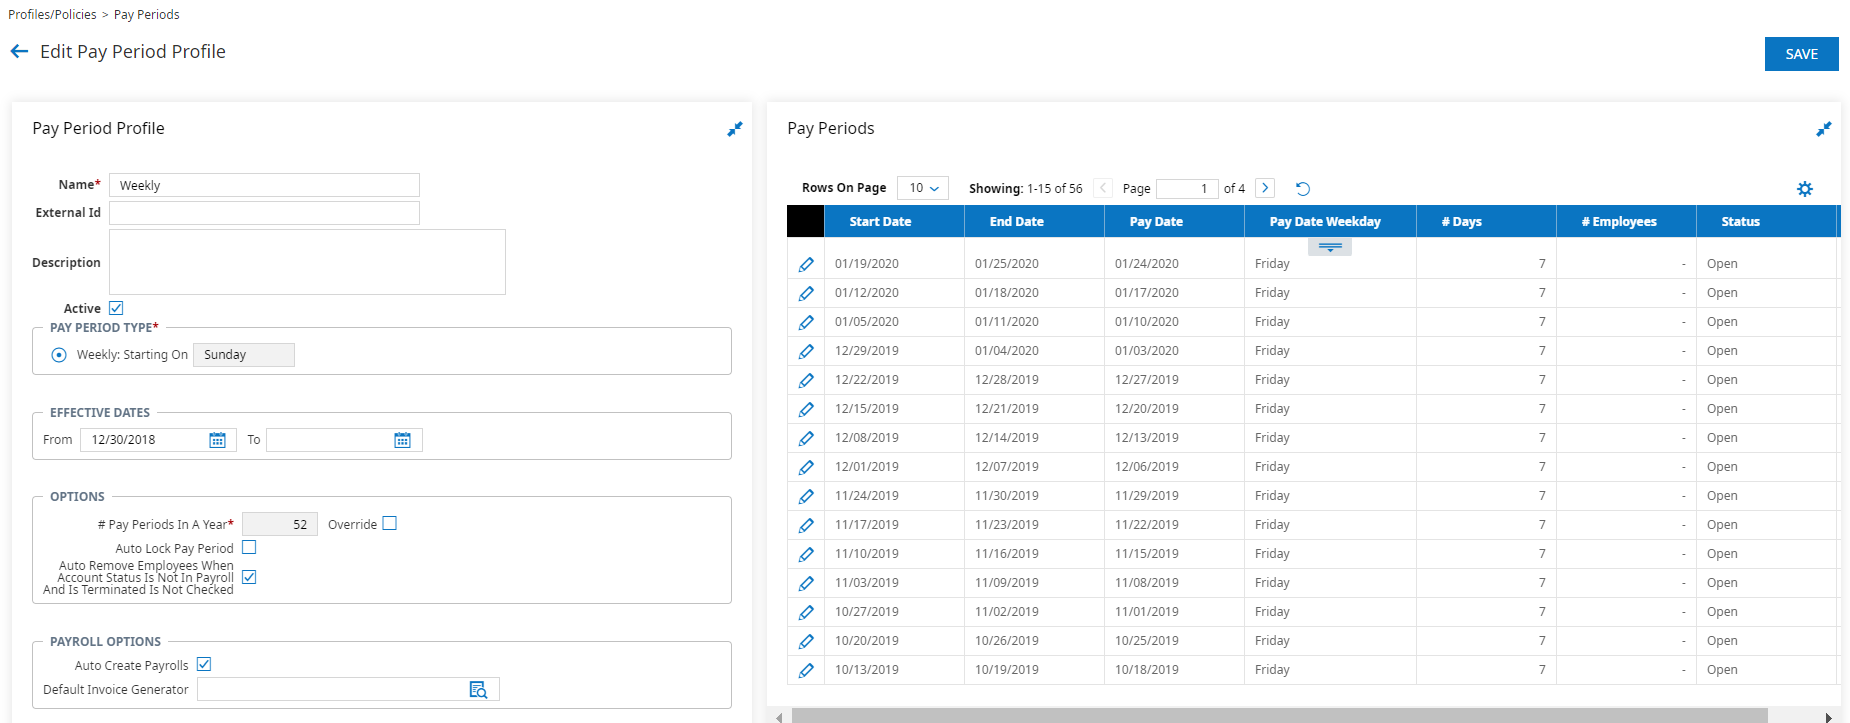
In the Pay Periods widget, select the Edit Dates pencil icon if you want to edit the pay period date information.
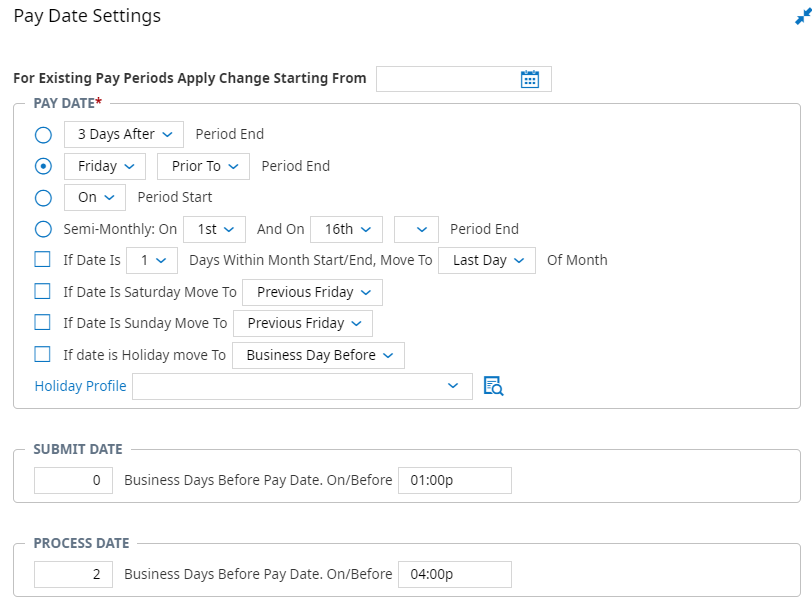
Additionally, in the Pay Date Settings widget, you can configure the Submit Date, Process Date, and Pay Date for each pay period.