In Timekeeping, each defined Attestation The act of confirming or attesting that something is true. For example, when punching out, users may need to attest that they took their meal breaks. button includes a number of Attestation processes that are created using Workflow Designer. Universal Device Manager (UDM) Manages the configuration of terminals and communication with the system. (UDM Universal Device Manager manages the configuration of terminals and communication with the system.) integrates these Timekeeping Attestation processes through Attestation Smart View. The Attestation buttons from Timekeeping become Smart View in UDM. When a UDM Attestation Smart View is run, UDM sequentially runs each Attestation process defined for the associated button. UDM uses a pass-through business process An organized flow of activities or tasks that achieves a business goal. An automated business process minimizes the amount of paperwork and manual tasks to complete that process by way of automatic actions, online forms, and automatically generated messages. model (BPM) process to integrate with the Timekeeping Attestation process APIs.
UDM renders forms that are included in each Attestation process as defined in the Workflow Designer. However, due to limits on the forms that data collection devices can render, UDM supports a limited set of form definitions:
- Confirm with Label
- Confirm with Scroll
- List with Label
- List with Statement
- Free Text
This means that you can only use three Workflow Designer components (radio buttons, dropdowns, and display text) to create forms that can render on data collection devices:
- From the Main Menu, go to Administration > Application Setup > Attestation > Attestation Models.
- Select a model and click Edit
. Workflow Designer opens with the workflow displayed. (You can also click New -
To open the editor, click Visual Editor from the upper right corner of the page. The main workflow edit page opens.
- Select a form in the workflow and then click Referenced form in the User task box.
- Click New form and then give the form a name and description, and click Create form.
- On the left side of the Form Design page are a number of components. You can only use the following components:
- Radio buttons — Radio buttons can be used to create the following types of forms:
- Confirm with Label — Includes a question and two buttons for choices.
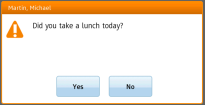
- Control with Scroll — Includes a long label and two buttons for choices
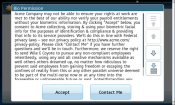
- List with Label — Includes a question and more than two buttons for choices.
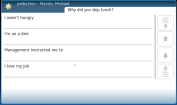
- Dropdown — Used to create a List with Statement form that includes a question in the label with one or more dropdown choices.
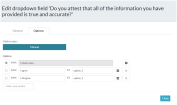
- Display text — Used to create a Free Text form that includes a label and an answer that the user must input from a virtual keyboard.
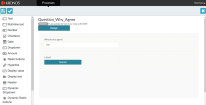
- Note: The question is limited to 60 characters. If the question is too long for the form, it will run over and appear to be truncated.
See the